
Webhooks is a term used for sending data to a URL when an event happens. An example is when someone subscribes to an email marketing list, the service that manages the list can send data like the subscriber’s name and email to another system like a Customer Relationship Manager.
In this article, you’ll learn how to add and update WooCommerce Webhooks with these
But fist, let’s discuss some ways that webhooks can be used.
How can webhooks be used?
With today’s integrated services and the no-code movement webhooks provide a way to share updated data with an external service after an event. This could include:
- An order is placed and needs to be fulfilled
- A customer registers on a site and needs to be added to a CRM
- A product is added and needs to be included in a social media content calendar
- A customer updates the shipping address on an order and the new address needs to be sent to a 3PL
As a bit of history WooCommerce Webhooks were added to the WooCommerce 2.2 codebase in July of 2014.
Note: This example is tested with WooCommerce 5.3 and WordPress 5.7.
Add WooCommerce Webhooks
To get started with webhooks, you’ll want to log in to your WooCommerce shop as an administrator. Navigate to WooCommerce > Settings and click the Advanced tab. Click the Webhooks link in the sub menu. At first you’ll see an empty list of webhooks.
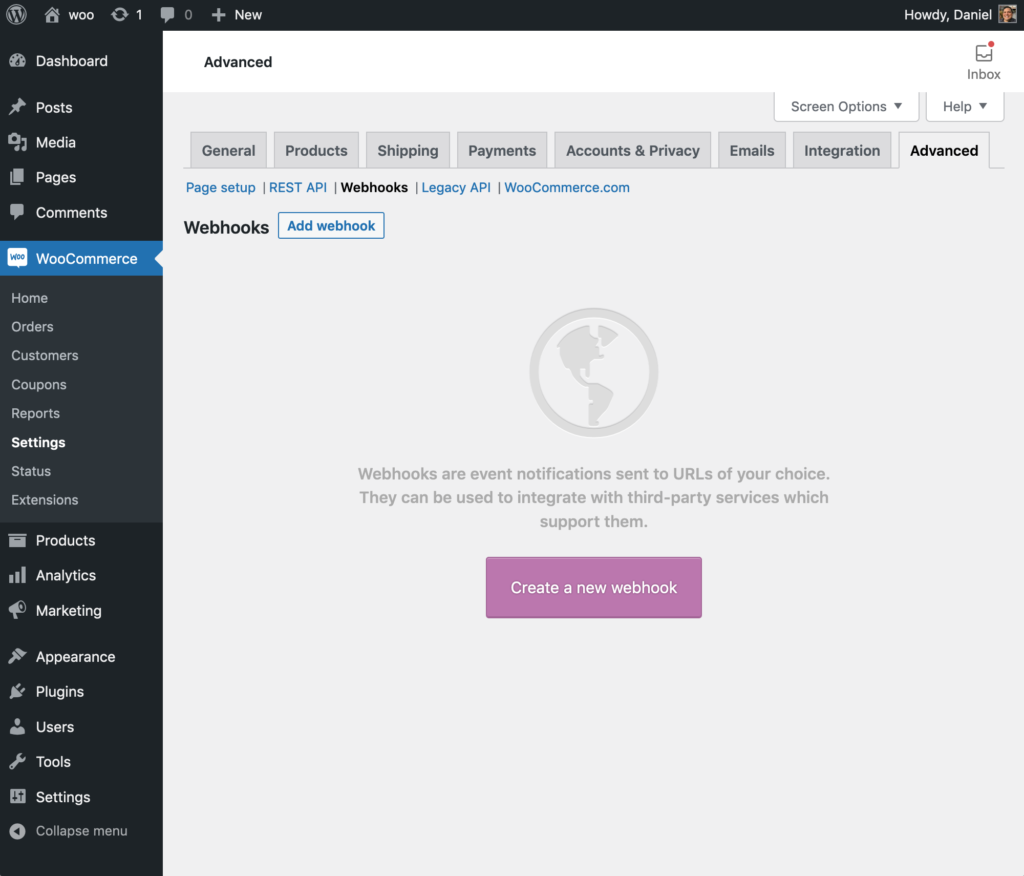
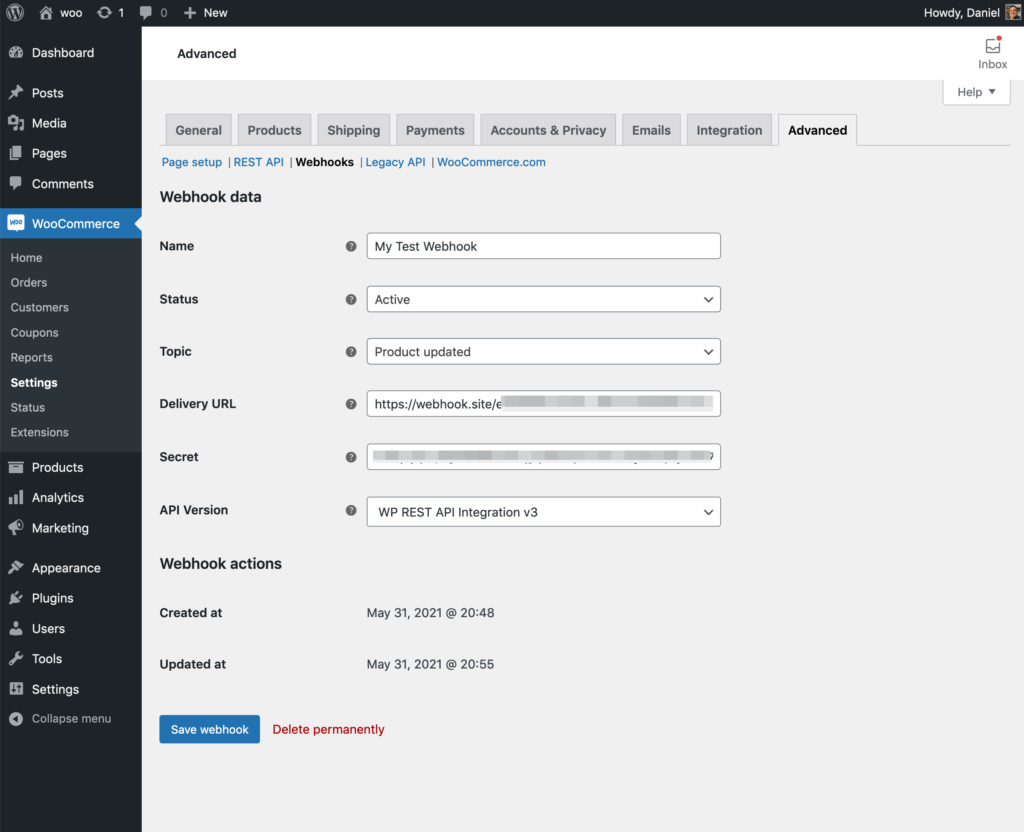
The first step is to press Add Webhook. The webhook will be added and then the settings fields will be displayed. The settings fields are described below.
Name
This is a description only for store administrators. This can be set to whatever will help you know what the webhook is for.
Status
Webhook status of either Active, Paused, or Disabled.
Topic
The event that will cause the webhook to fire. WooCommerce supplies 15 actions and two custom actions. The pre-defined actions are listed below.
- Coupon created
- Coupon updated
- Coupon deleted
- Coupon restored
- Customer created
- Customer updated
- Customer deleted
- Order created
- Order updated
- Order deleted
- Order restored
- Product created
- Product updated
- Product deleted
- Product restored
To use a custom action select Action.
Action event
If Action is set as the Topic, then an additional setting field named Action event is displayed. This field will contain the WordPress hook that will fire the webhook. For example, if the site has a custom plugin with this line:
do_action( 'after_order_exported' );
Setting the Action event setting to ‘after_order_exported’ will fire the hook at the appropriate time.
Custom
If Custom is set as the Topic, then an additional setting field named Custom topic is displayed. This field will contain the name of a custom topic that has been added using this filter:
woocommerce_webhook_topic_hooks
Delivery URL
This is the URL that the webhook payload will be sent to. You can request this URL from the provier who will
Secret
The secret field is used to generate a hash of the webhook’s body and that hash is provided in the request headers. This can be used to authenticate the webhook on the receiving side.
API Version
Choose one of three available API versions. It’s okay to leave this as “WP REST API Integration v3” unless you have special circumstances.
For testing purposes, I set up my webhook with these options:
- Name: Product Created
- Status: Active
- Topic: Product updated
- Delivery URL: Leave this empty for now
- Secret: a random string
- API Version: WP REST API Integration v3
The webhook can’t be saved yet, so leave this page and open a new browser window.
Test WooCommerce Webhooks
To test your WooCommerce webhook you will need either a free website that will receive the webhook request, or build a custom app. If you want to go the built it yourself route here is a package for receiving webhooks in a Laravel app.
Important: If you choose to use a free app be sure to read and understand the site’s privacy policy and never test with customer data.
For this walk through I’m going to use Webhook.site (privacy policy).
Opening the webhooks site will give you a unique URL for the webhook:
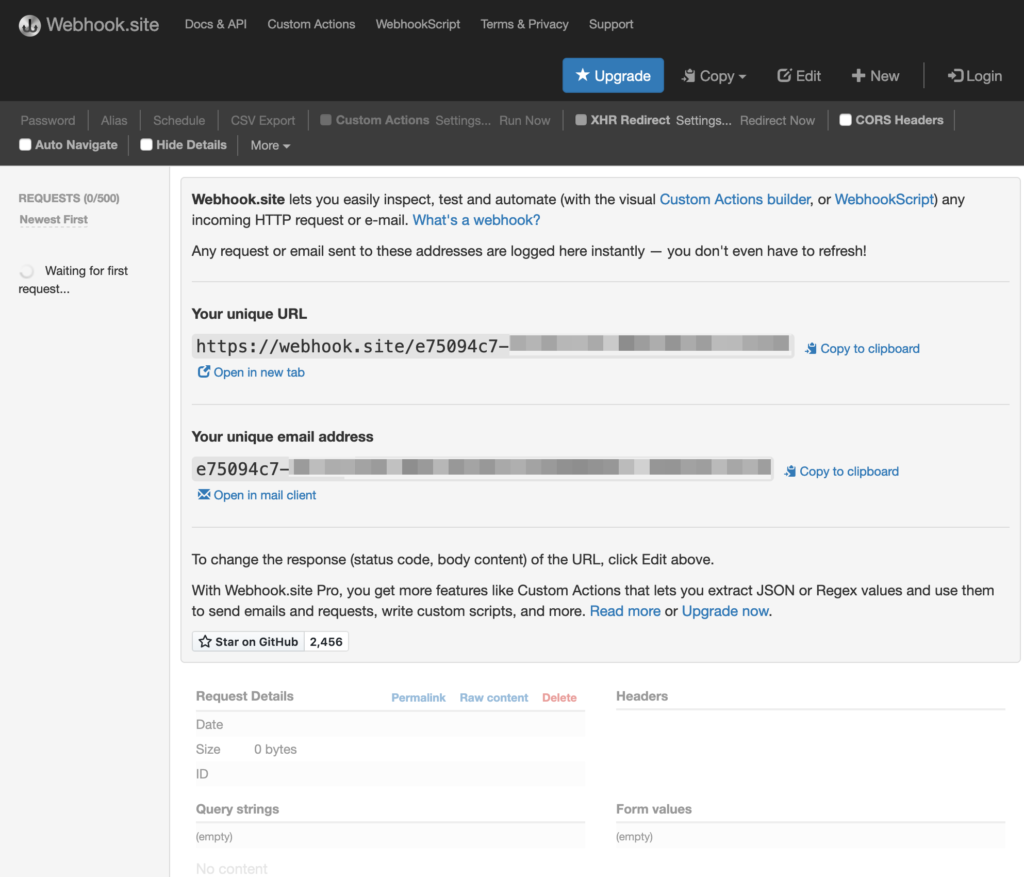
In the Your unique URL section click Copy to clipboard.
Paste the URL to the webhook settings page in the Delivery URL field and press Save Webhook. Keep the webhooks page open as we’ll need this after the test.
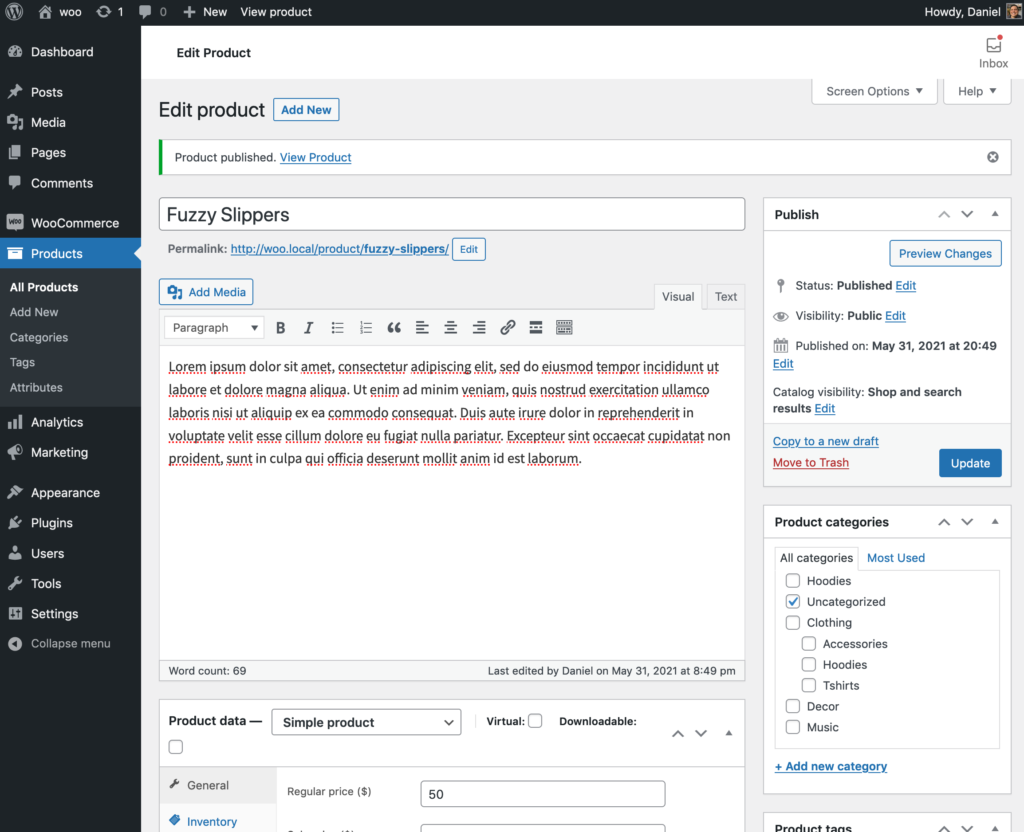
The next step is to do the action that will trigger the webhook. For this example, I’m going to create a product. To do this I navigate to Products > Add Product. I add a test product named Fuzzy Slippers, add some content, and set a price of $50 then published the product. When I press Update after changing the product it will be updated and the webhook will be triggered.
After publishing and updating the product, go back to the webhooks window. You should see the connection from WooCommerce as a POST with full details of the webhook.
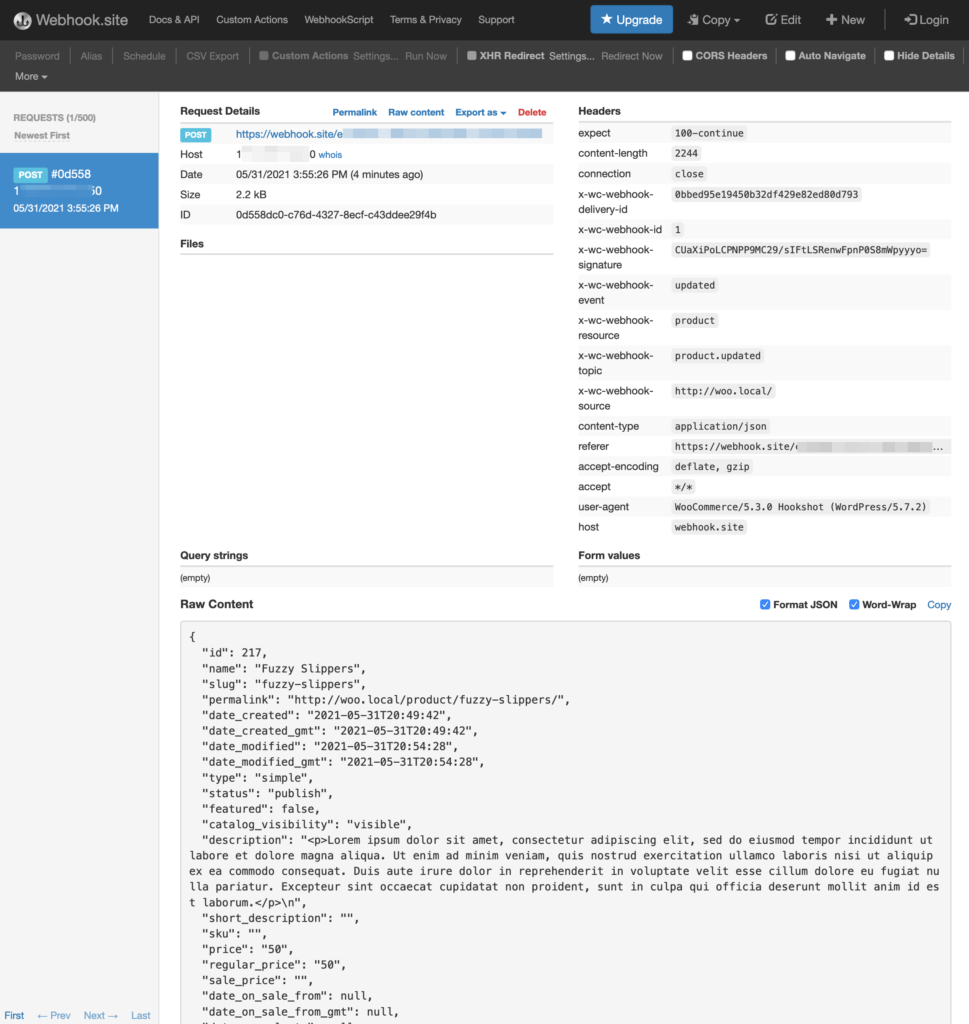
The content is the product’s data in json format.
Final thoughts
Webhooks are a very useful way to integrate your WooCommerce store with external systems. Using webhook.site is a fast, free, and easy way to test WooCommerce webhooks, to make sure they are working and be able to inspect the payload and see what data is being delivered.
Have more questions? We’d love to hear from you.
If you still have questions on the best way to update prices in subscriptions please get in touch! We love helping WooCommerce store owners understand their options when managing their store.
Fill out the following form and we can start a conversation about your project!